Note: This post was created out of a demonstration for the Beyond the Blog: Making Your (Digital) Teaching Portfolio event. Further resources on teaching portfolios from the event can be found here.
When you’re posting materials online, sometimes you don’t want everything to be publicly visible to everyone. Other than setting a site-wide privacy level (see this post for more information), you can specify passwords for your various content: pages, posts, and documents.

How to Password Protect Posts & Pages
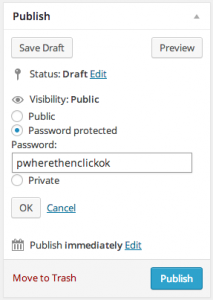
When you are creating content inside a post or page, you have the ability to password protect that entire post or page. To do so, you click to Edit Visibility in the Publish box to the immediate right of the main content editor. Once you do so, you will see three options: public, password protected, and private. When you click password protected, you can specify a password, then click the OK button to set the password for the post or page. When someone accesses your content, they will be asked to input your password to proceed to the post or page. For more information about content visibility in posts and pages, see this informative page on the WordPress Codex.
How to Password Protect Documents (using the WP Document Revisions plugin)
If you have documents (.pdf, .doc, .docx .xls, etc.) that you want to share on your website in a protected fashion, you can activate the WP Document Revisions plugin (through Plugins menu on the Dashboard). This plugin touts itself as a document management system and allows for collaboration among a team on various documents. At a more basic level, the WP Document Revisions plugin creates a Documents menu item on your Dashboard where you can upload and control all your documents, much like the built-in Media library does so for all of your images.

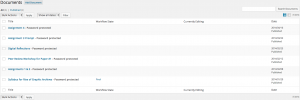
When you click the Documents menu item, you are taken to your documents library where you can upload new documents and edit existing ones. To add a document, click Add Document at the top of the documents library or in the Documents menu. You’ll be taken to a screen when you can upload a document and set the parameters for it. Once on this screen, click Upload New Version and select your document that you want to upload. Once you upload the document, the screen will tell you that it’s been uploaded successfully, as seen in the figure below. Then, you can title the document as desired.

Password protecting your document is similar to password protecting a post or page, as you also do so through the Publish box on the right of where you upload your document. Once you publish your document, a URL will be created that you can add to your site menu (Appearance>Menus) through a custom link. To create a list of documents within a page or post, you can use the [documents] shortcode (for more on how to use this shortcode, click here).
Comments by Margaret Galvan